

Gary Muth.... is a self certified master photographer and artist living in his own reality. Enjoy my works, maybe learn a few tips.


Free Pluggins from Google
Nik soft ware is now offering all their plugins for free. All seven, Analog Efex Pro,
Color Efex Pro,
Silver Efex Pro,
Viveza,
HDR Efex Pro,
Sharpener Pro,
Dfine. These programs bundled probably cost around $350 and now Google is offering them up free. It dosen't get any better than that. Check it out here: Google Nik Collection
Spring Waterfall Workshop 2016
Don't forget about our spring waterfall work shop. Only two openings left. May 11th, hands on waterfall training of seven different types of waterfalls, 10 hour course, lunch and transportation to the waterfalls included. $150 per person. Must have camera with manual adjustments and tripod with you. Contact me if interested at: muth_gary@yahoo.com


What are the Odds?
Redo of a shot I took at Pocono Downs of a driver seriously checking out the odds board before the seventh race.


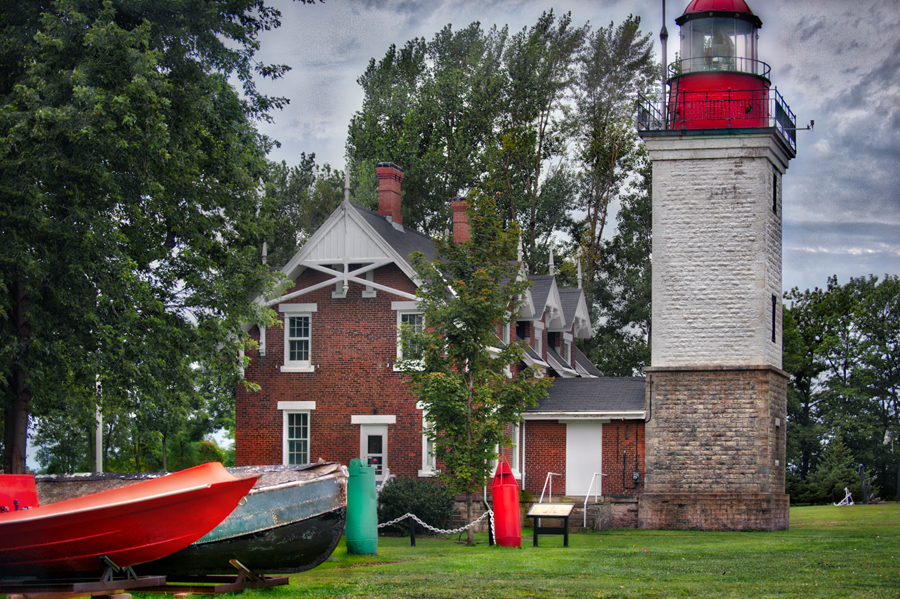
A Good Finish is Important
This picture of the Dunkirk lighthouse was taken on a overcast day in mid afternoon. The image is dull and lifeless. With good post processing techniques you can find a way to save this image. I used Aurora HDR Pro to bring up the vitality of this image. I then used layers to bring back the sky. Good camera skills are important but if you don't have a clue what to do with your image afterwords then its all for naught. Spend 40% of your time learning good camera technique and the 60% on good post processing skills. Your work will shine.


Fungi Macro
I focus stacked 33 images to capture this tiny mushroom. Shot with Canon Powershot SX50HS. Exposure was iso 80, 1/250th sec. @ f - 8. Raws converted into Tiffs with Adobe Camera Raw. Stacked in Zerene Stacker. Processed with Aurora HDR Pro. Sized for the web in Photoshop CC.


Wrong Side of the Tracks
Interesting thing about this shot is that for your own safety it is illegal to photograph on train property without permissions. So I found it weird that the sidewalk I was on crossed the train tracks with no signal signs or lights to warn of on coming trains. So if you're one of those photogs that think photographing people like seniors or brides on train tracks is great because the rails tend to draw the viewer into the picture and makes great composition, guess what you and your clients are trespassing and could be prosecuted. Shoot responsibly.


Panorama Made Simple
I made three exposures of the Jonathan Hager house making sure I had some over lapping of the scene.
1) Load raw images into Adobe Camera Raw. Don't worry about making any major post processing yet, you just want ACR to make a raw conversion. Select the three images. On the tool bar above go to tools > photoshop > photomerge...
2) Your images will be automatically converted and appear in the photomerge box in photoshop. Select auto layout and click ok.
3) The photos will now be automatically merged together, but may not be even around the edges. Use the crop tool to make a long rectangle format image of your panorama. Now merge the three layers.
4) You are now ready to finish your image any way you choose.


Winters End in Gettysburg
Winter is now coming to an end in Gettysburg. View of the McLean farm from the battle of Gettysburg.


Post Process it Right.
Using the new Aurora HDR Pro to post process some older images I shot in Nevada a while back. The presets work great but you came make your own presets to satisfy anyones taste. The HDR detail tool really adds sharpness and makes your images pop.


Yosemite
Trying to find new and interesting angles at America's most photographed park isn't easy. Here's my best effort with some varying focal lengths.


Upper West Side Columbus Ave.
One thing I especially like about the new Aurora HDR Pro software is the fact that one can take mediocre images and make it interesting easily. Trey has added some great pre sets that make any photo pop.


Big Price vs Low Price
Don't fall into the, "If I only had a better camera I could do that too"syndrone. The images below were taken with two different cameras by two different camera manufacturers. One was a high end top of the line professional camera with a price tag of over $6000 and the other was a low end point and shoot priced at $400. Knowing how to use your equipment and proper camera techniques will level any playing field. It's not about how expensive your camera is but what you do with the camera you have. Today digital media has developed to the point where you can actually make and sell pictures made from your iPhone. Can you tell the difference? No...me neither, the only difference here is resolution. The point and shoot picture is most satisfactory for internet use and prints up to 16x20 but the resolution will break up quicker upon enlargement and will need extra care.

 For anyone interested, the top image was the point and shoot.


Waterfall Workshop 2016
I am hosting our waterfall workshop this year on May 11th. This year we will be doing seven waterfalls. They are Lockport falls, Royalton falls, Medina falls, Clarendon falls, Holley falls, Akron falls and finish with Niagara falls. Ten hours, hands on training on proper techniques. Transportation and lunch is included. Must have a camera with manual exposure adjustments and a tripod. Seats are limited, email, muth_gary@yahoo.com if interested.


Tunnel View for the Billionth time
This is called the tunnel view at Yosemite National Park. I was looking for a dramatic image of this magnificent scene so I shot in B&W. The overlook was crowded with many tourists, like me, trying to get that epic image that Ansel Adams has made so iconic. One could only hope he would be flattered that so many people want to emulate him. They say copying is the greatest form of flattery. I would guess this image is only one of the billions of images taken from this spot.


Feeding Nuthatch
Our resident nuthatch prefers C&S High Energy Suet Cakes during the cold winter months. While feeding this guy still has time to ham it up for the camera. Quick shot in our backyard with Nikon D3 with 70-200mm 2.8 lens. Iso 800, 1/800 at f-4, -0.33 exposure compensation. Raw conversion with Aurora HDR Pro with additional exposure and color adjustments in Photoshop CC.


Too Late Almost
I had plans to visit New York on January 23rd but winter storm Jonas made me wait until the weekend after. One, glad I did because the streets were clogged with snow. Two, regrets because by the time I got there the park was trampled. Here are a few I got in Central Park on the 31st a week later.


On Broadway
This interesting building was on Broadway and 73rd St. in NYC. What I love most about the Canon powershot hs50 sx is the zoom. The small lightweight camera zoom is perfect for travel photography. Saves me from carrying a lot of gear. I was very unhappy when Canon butchered the new model. As a real photographer I would gladly give up all the gimmicky gadgets meaning the scene modes, face detection, and so on and keep the real stuff like raw format, flash mount, faster focusing. Just my opinion.


Who You Gonna Call
My recent trip to New York City I got a chance to photograph the famous apartment building that was possessed by Zuul the Gatekeeper of Gozer in the 1984 Ghostbuster movie. I took a few creative liberties and added some effects to the images.


Tips for Birding in Florida
Things you need to get right when photographing birds. Always have the eyes sharp. Make sure the bird is showing a frontal or side view. Always get a proper exposure. This white egret is very difficult to capture all it's details in the white feathers against the blue background, but when done right it looks awesome.


Race Day
This image is one I shot last year at Presque Isle Raceway in Erie. I wanted to re-work it with new Aurora HDR pro software.


Lucy.....I'm home
I just had to stop and grab this picture. I was in Jamestown,NY the birth place of the great comedian Lucille Ball and I saw this mural and just couldn't resist snapping a picture. Everyone my age grew up watching episode after episode of I Love Lucy. This mural depicts Lucy, Ricky, Fred and Ethel driving in a convertible having a great time. Such great comedians and such great memories. The mural is huge and painted on the side of a three story building on Harrison Street right across from Friendly's Restaurant.


Who Stinks ?
Halyomorpha halys - brown marmorated stink bug. I used focus stacking for this guy. I took 55 images at varied focus depths and stacked the images in zerene stacker. The image was then finished off in Photoshop CC. Canon powershot SX50 HS w/ Raynor 250 ISO 80 f-8 @ 1/400 sec. Two SB600 speedlights @ 1/64 power, focus rail.


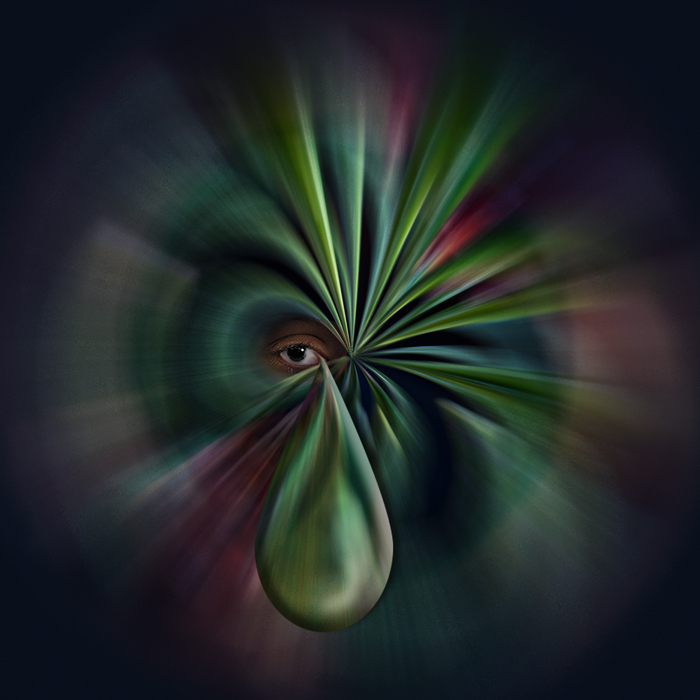
Using HDR for Depth and Detail.
You can use HDR photography to bring out depth and detail. This image was made using 5 bracketed shots at -1 stop intervals. I merged these images in Aurora HDR Pro and over saturated some of the colors to broaden the tonal value of my image. I finished it in Photoshop CC by creating a new adjustment layer in B&W and adjusting color tones individually until I got the desired result.


Subscribe to:
Comments (Atom)